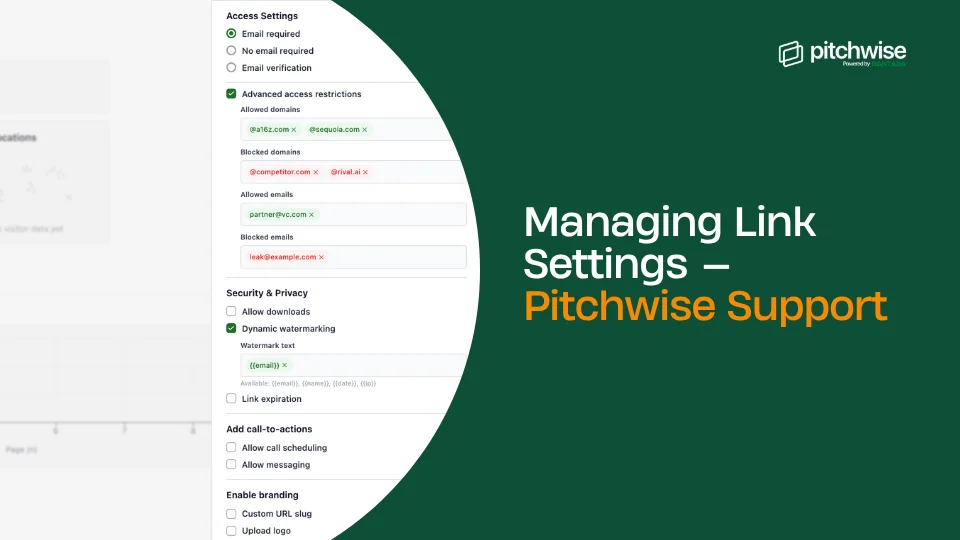
The Link Settings panel controls everything about how your shared document link behaves: who can view it, how they identify themselves, whether they can download the file, and how the viewer experience looks. You can also use it to add a call booking button or a direct message option inside the viewer.
To open the panel, find your document in the dashboard and click the chain link icon next to the Copy link button.
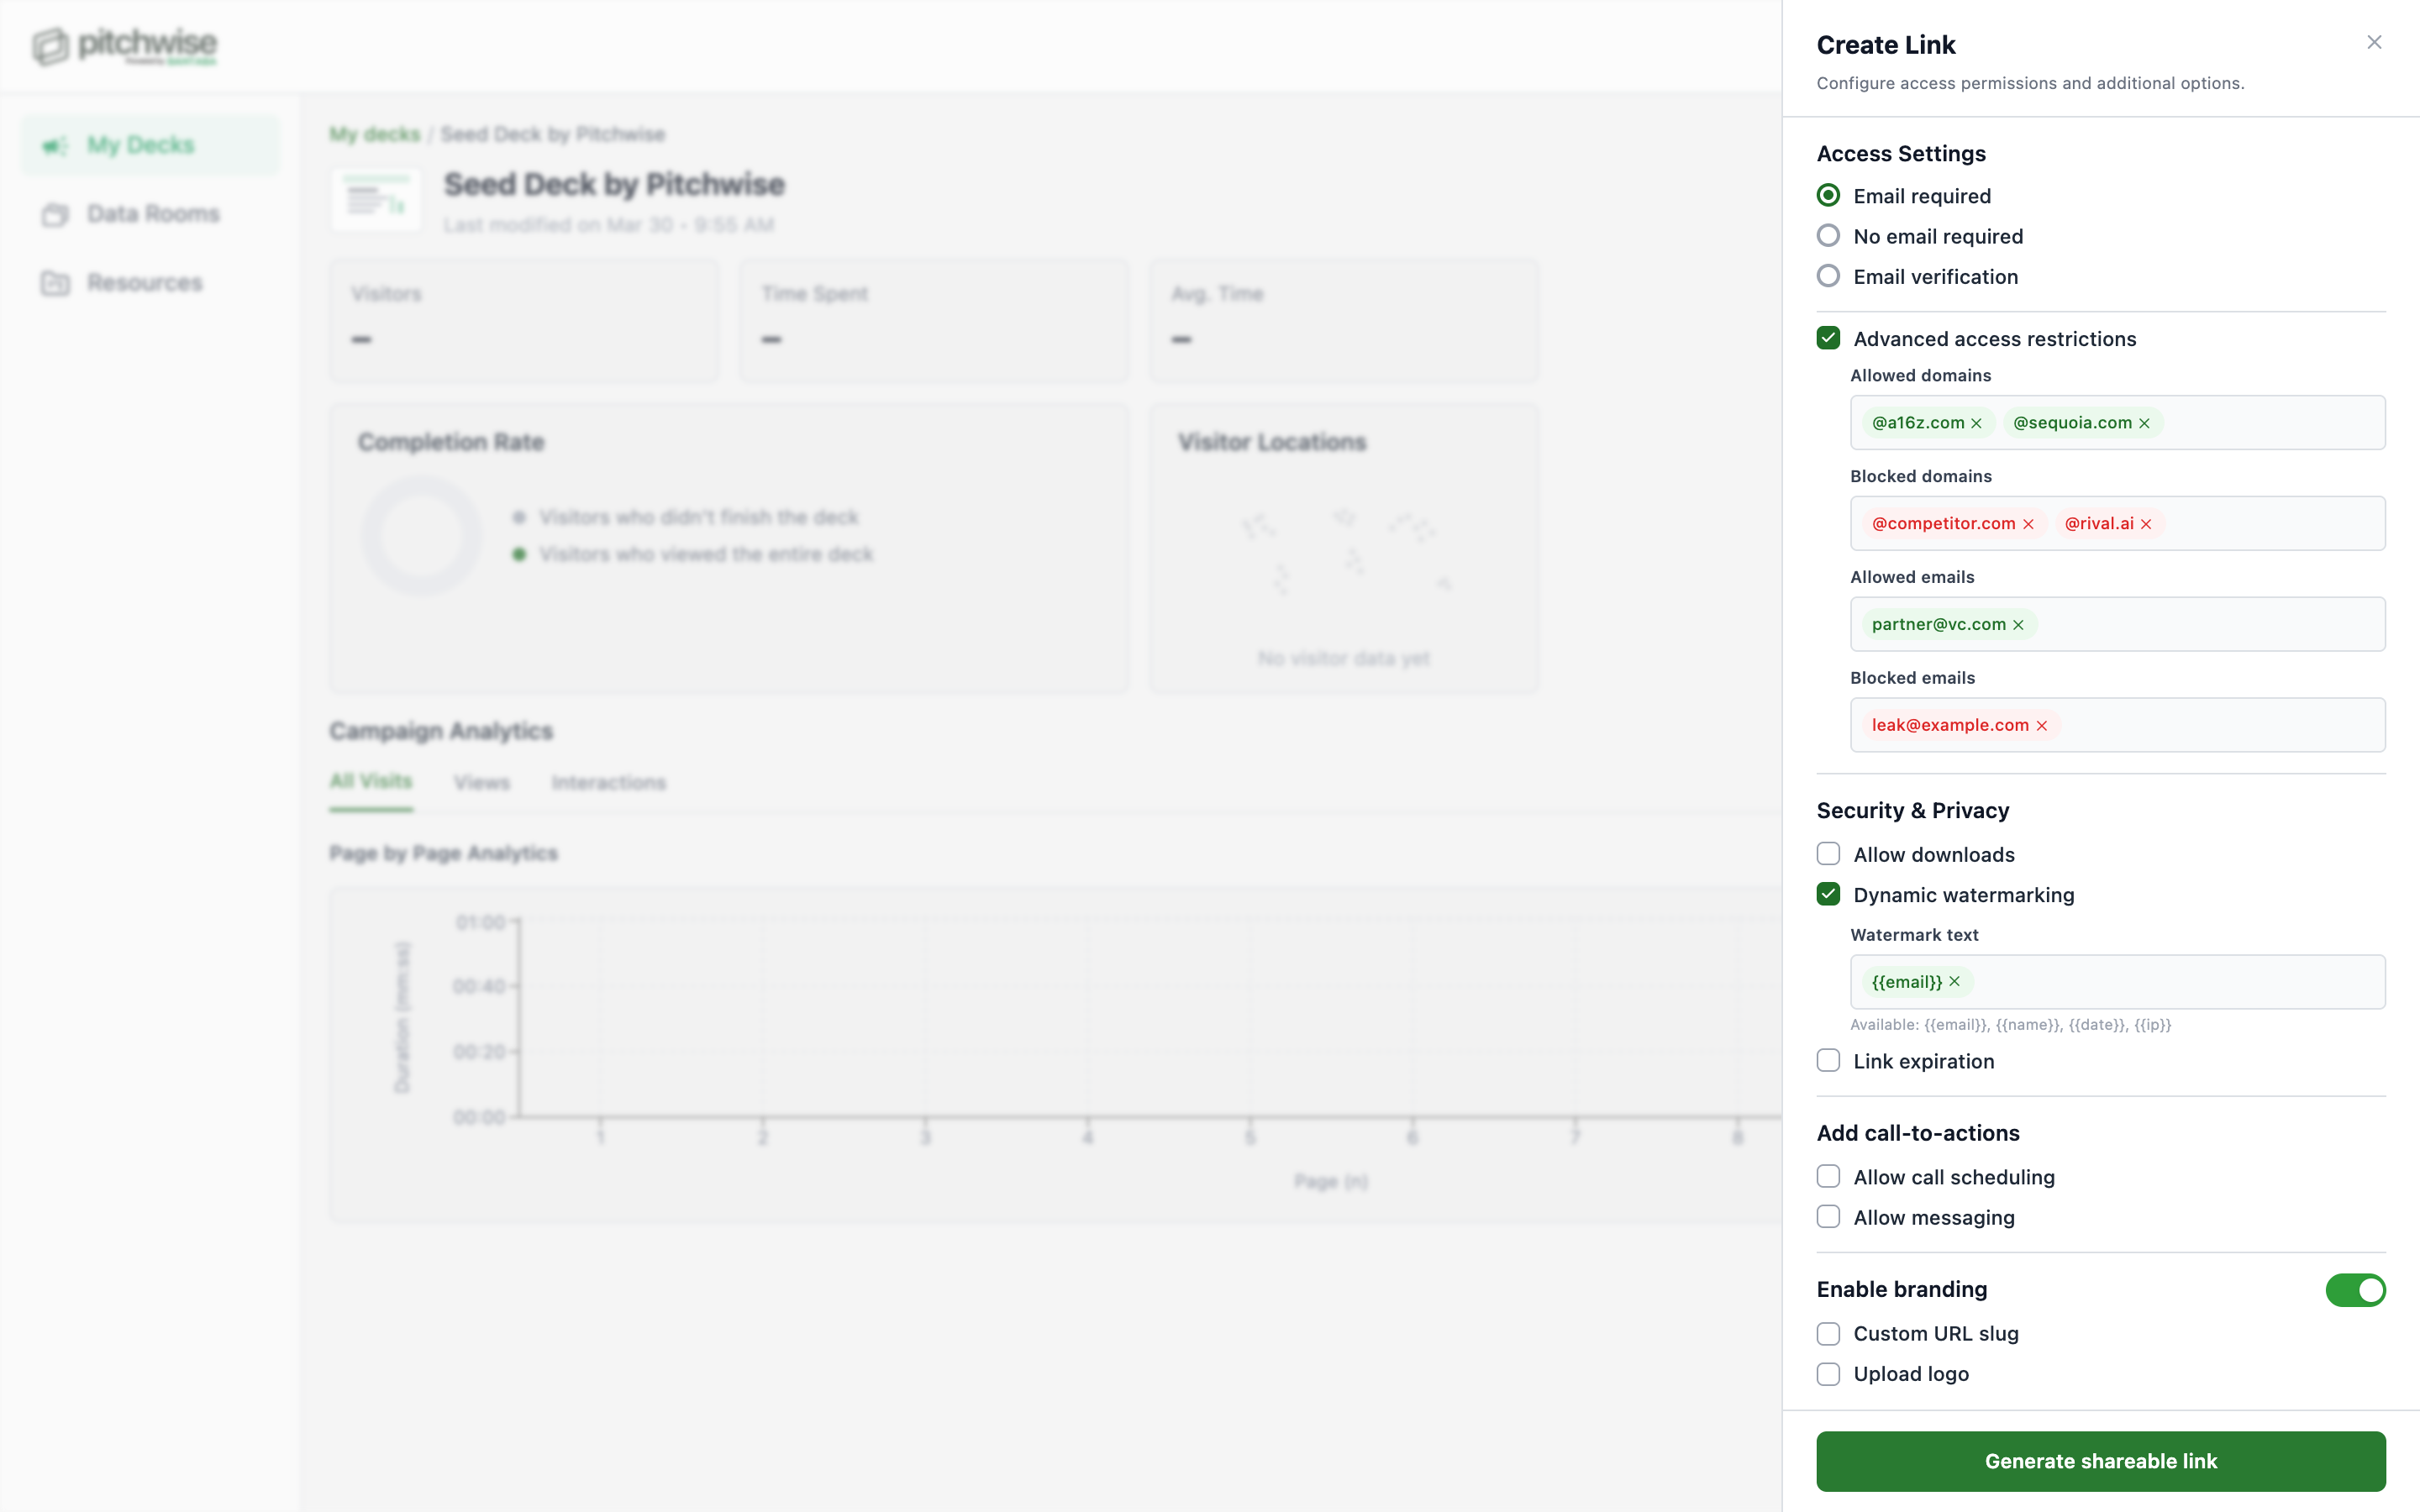
Access Settings
Access Settings control whether viewers must identify themselves before they can open your document. There are three options. Choose one depending on how much you need to know about who is viewing.
Email required
Viewers are prompted to enter their email address before the document opens. The email is recorded but not verified with a code, so anyone can type an address. The analytics dashboard will show that email alongside their engagement data.
Use this when you want to know who is viewing but do not need to confirm their identity with certainty. Good for sharing with a defined group where trust is already established.
No email required
Anyone with the link can open the document immediately, with no prompt. You will see visit data in analytics, but no names or emails will be attached to those views.
Use this for broad public distribution: a website embed, a social post, or early-stage outreach where reducing friction matters more than capturing identities.
Email verification
Viewers enter their email and then receive a one-time passcode to their inbox. They must enter the code before the document opens. This confirms the email address is real and belongs to the person viewing.
Use this when sharing with specific named individuals where accurate per-person analytics matter. Every view in your dashboard will be tied to a confirmed identity.
Tip: Email verification gives you the most reliable per-person data. Use it whenever you are sharing with a small, specific group — investors, clients, or partners — and you want to know exactly who read what.
Additional CTAs
CTAs add action buttons inside the document viewer so recipients can take the next step without leaving your document.
Allow call scheduling
Turns on a "Schedule call" button inside the viewer. To enable it:
- Check Allow call scheduling.
- A Calendar Link field will appear directly below the toggle.
- Paste your Calendly URL (or any other scheduling link) into that field.
- Click Save changes at the bottom to save.
When a viewer clicks the button, they are taken to your scheduling page to book a time directly. They do not need to leave the document to do it.
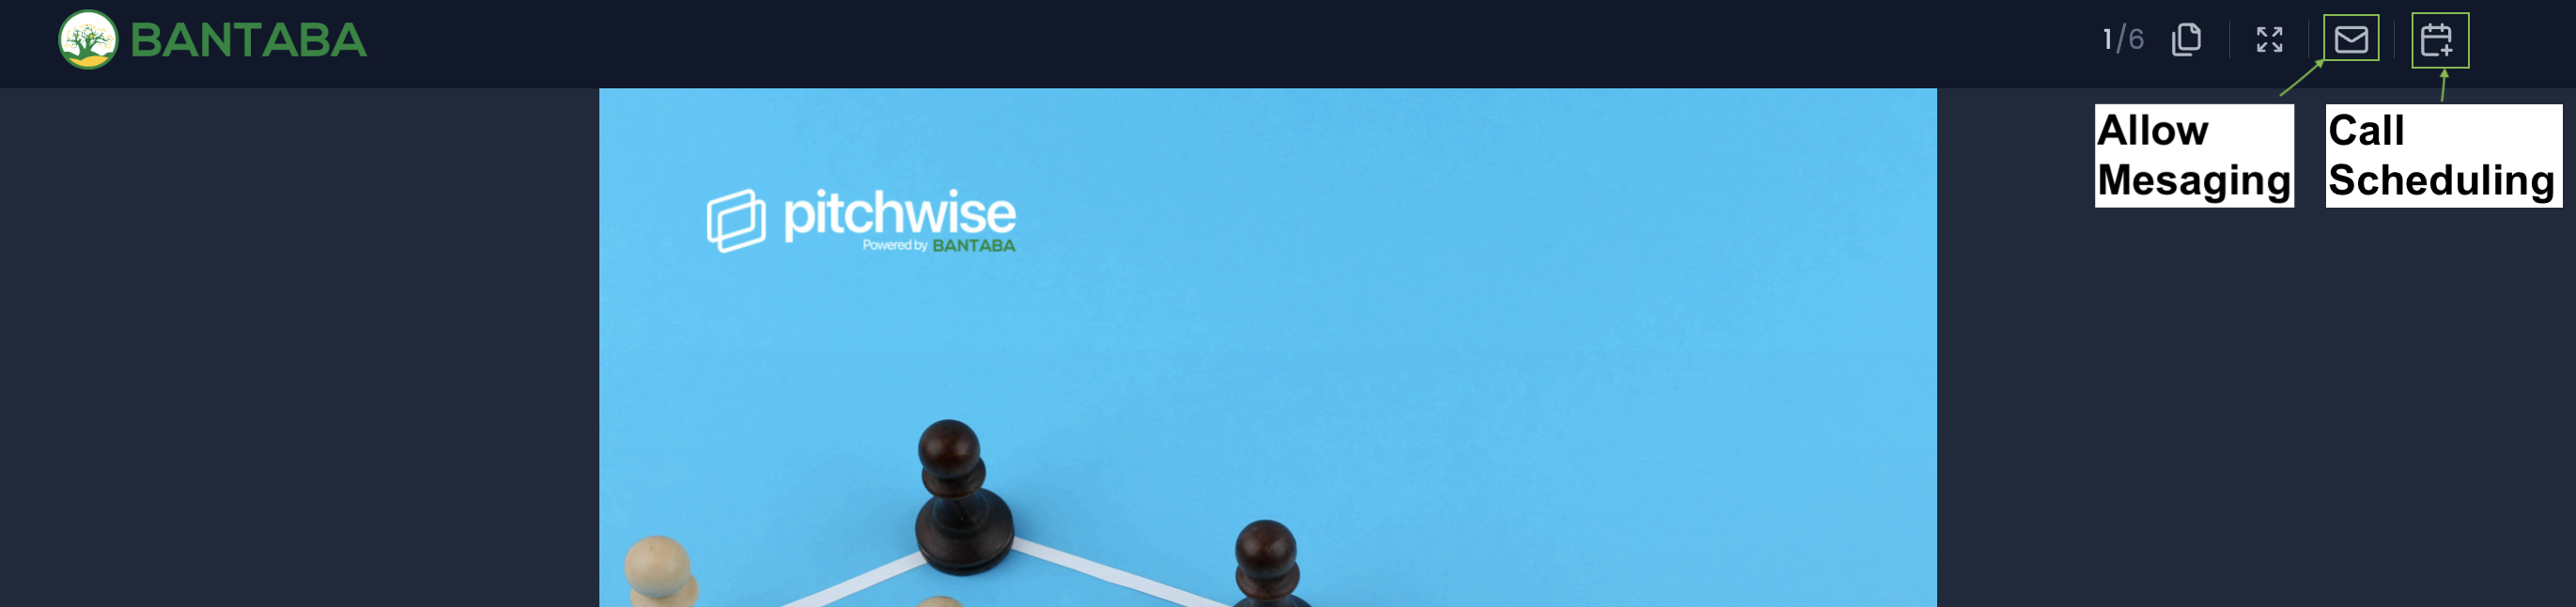
Allow messaging
Adds a message button inside the viewer. Viewers can send you a message directly from the document without needing your email address. Messages come through to your Pitchwise inbox.
To enable it, check Allow messaging and click Save changes at the bottom to save.
Security
Allow downloads
When unchecked, viewers can read your document in the browser but cannot save a copy of the file. The download option is hidden from the viewer entirely. When checked, viewers can download the original file to their device.
Note: Turning off downloads prevents the file from being saved directly, but it does not prevent screenshots. Use download restrictions alongside email verification when document security matters most.
Open deck to our investor network
When this is turned on, your document becomes discoverable by investors on the Pitchwise investor network. Investors on the platform may find and view your document without you sharing a direct link.
To enable it:
- Toggle on Open deck to our investor network.
- Fill in your Sector, Stage, Markets, and Raising Amount. These fields help match your document with investors whose focus areas are relevant.
- Click Save changes at the bottom to save.
Note: This setting cannot be reversed once enabled for a document. Only turn it on when you are ready for the document to be discoverable publicly on the network.
Enable custom branding
Custom branding changes how your document link appears and how the viewer experience looks when someone opens it. There are two settings: a custom URL and a company logo. Each one is independent; you can use one or both.
Create a custom URL
By default, Pitchwise generates a random string for your document link, such as app.pitchwise.se/v/xk29qm. A custom URL replaces that random string with a path you choose, making the link more recognisable and easier to share.
To set a custom URL:
- Make sure the Enable custom branding toggle is turned on.
- You will see a text field labelled 'Create Custom URL' below the toggle.
- Type your chosen path into the field. For example, typing InvestorsMeeting gives you the link app.pitchwise.se/v/InvestorsMeeting.
- Use letters, numbers, and hyphens only. No spaces.
- Click Save changes at the bottom to save and generate the new URL.
Tip: Choose a path that reflects the context of the share, not just the document name. For example: SeriesA-Deck, ClientProposal-Acme, or BoardUpdate-June. It makes the link more meaningful when the recipient sees it.
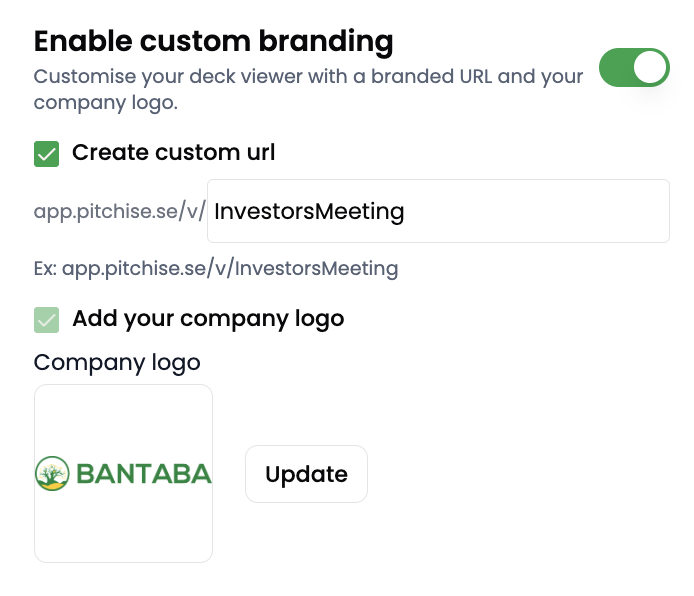
Add your company logo
Uploading a logo replaces Pitchwise branding in the document viewer with your own. Viewers see your company name and logo when they open the document, not Pitchwise's.
To add your logo:
- Make sure the Enable custom branding toggle is turned on.
- Click the logo upload area. It will open a file picker.
- Select your logo file. PNG or SVG files work best for clean display. Keep the file under 2MB.
- The logo will appear as a preview once uploaded.
- Click Save changes at the bottom to save
Editing your Document name
Each link you create is saved in your Pitchwise dashboard. The name is how you identify the link in your analytics; it appears in your document's link list and in the analytics sidebar when you are reviewing engagement data.
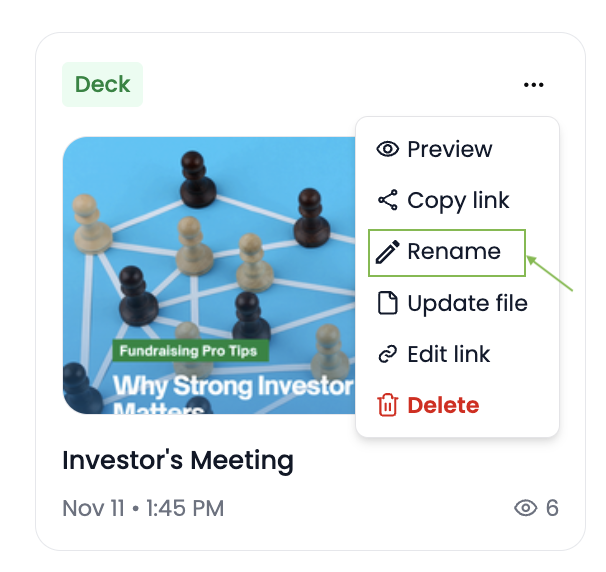
To rename a document:
- Go to your dashboard.
- Find the document you want to rename in your list
- Click the three-dot menu and click on the Rename option.
- Type the new name.
- Click Save.
Tip: Name documents by who or what they are for, not just when you created them. "Sequoia — June 2026" is more useful than "Link 3" when you are scanning engagement data weeks later.
Updating files on an active link
If you need to update the document on a link that is already live and has been shared, you do not need to create a new link. You can replace the file and push the update to the existing link so anyone who opens it sees the new version.
To update the file on an active link:
- Open the document in your dashboard.
- Click the change file option. This will prompt you to upload the new version of your file.
- Upload the new file. The document will update in the background.
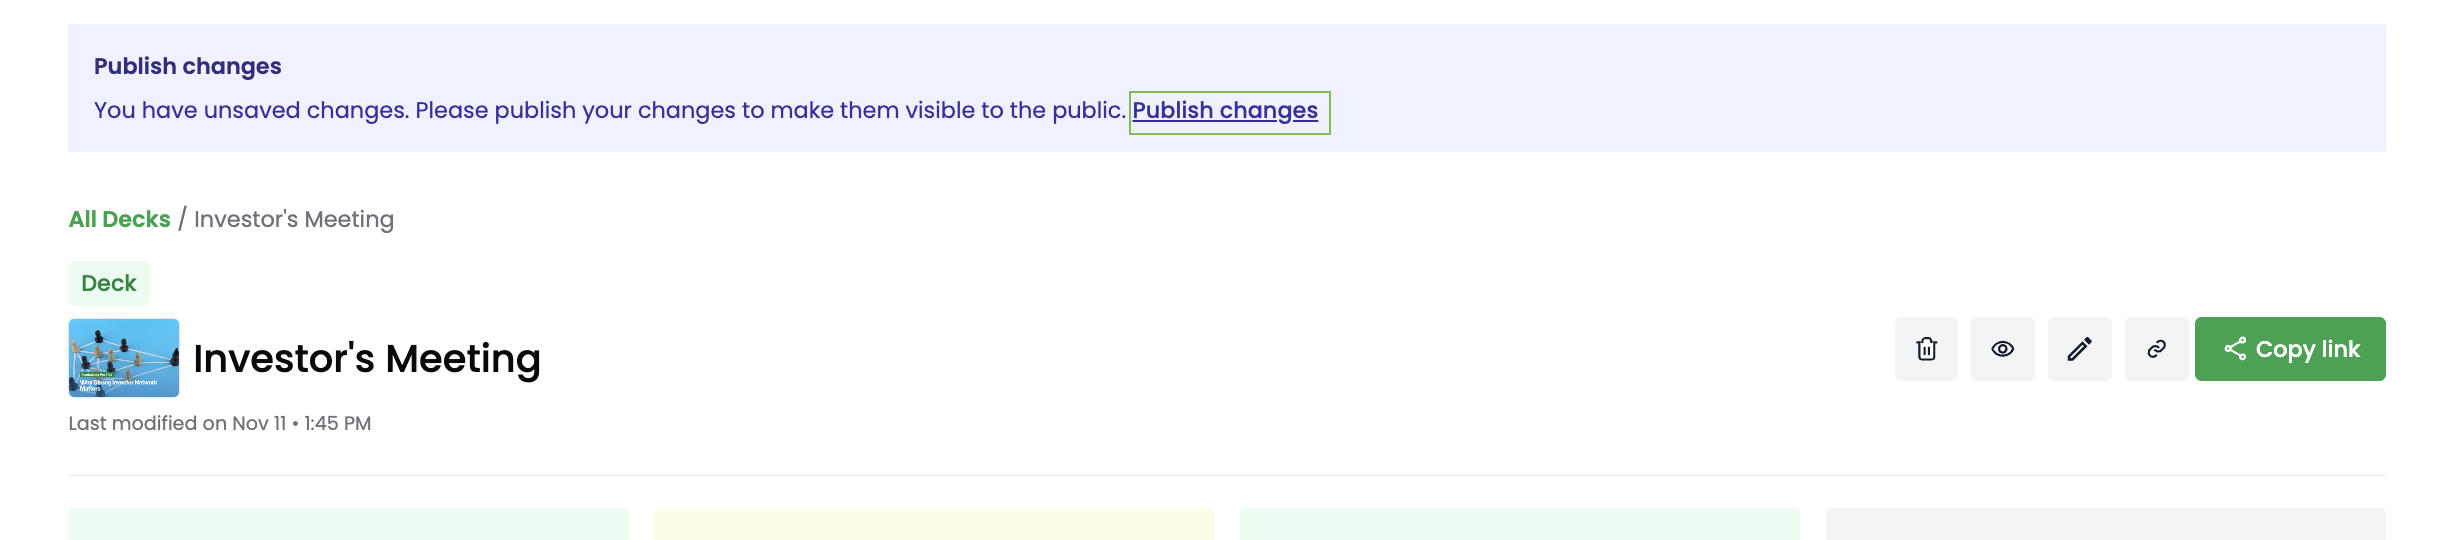
- A modal to Publish the new document will appear. Click Publish to make the changes live. The link recipients already have will now open the updated version.
Anyone who opened the document before the update will see the new version on their next visit. Their previous engagement data is preserved.
Saving your settings
Every change in the Link Settings panel takes effect when you click 'Save changes' at the bottom. This saves your settings and copies the link to your clipboard at the same time.
If you are updating settings on an existing link that has already been shared, you do not need to resend the link. The settings apply to all future opens of the same link.
Tip: For data rooms, access settings are configured separately. Go to Settings > Permissions inside the room. The link settings panel covers single-document links only.
Related articles
-> How to create a shareable link
-> Understanding slide-level analytics